Hi,
Im planning to write SAT Subject test soon. Can anyone please explain the process of submitting the SAT application. It would be great if anyone has a screenshot available for the relevant pages.
This would help others like me to register for SAT easily. Please share the screens soon.


1 Answers
-
4 Years Ago
Step 1: Verify the SAT Subject Test Date:
Firstly, visit the College Board website (www.collegeboard.org) and find the suitable Subject Test dates for you. Once you choose the test date, hit the blue “Register” link on that test date.
You’ve to create a new College Board account or you can sign in to the existing College Board account if you’ve already registered for the SAT Subject Test before.
Once you sign in, you’ll enter to your homepage. Hit on the yellow coloured “Register for the SAT” link. This will take you to the SAT Registration homepage.
Click the “Continue” button at the bottom right corner of the page.
Step 2: Create College Board Account
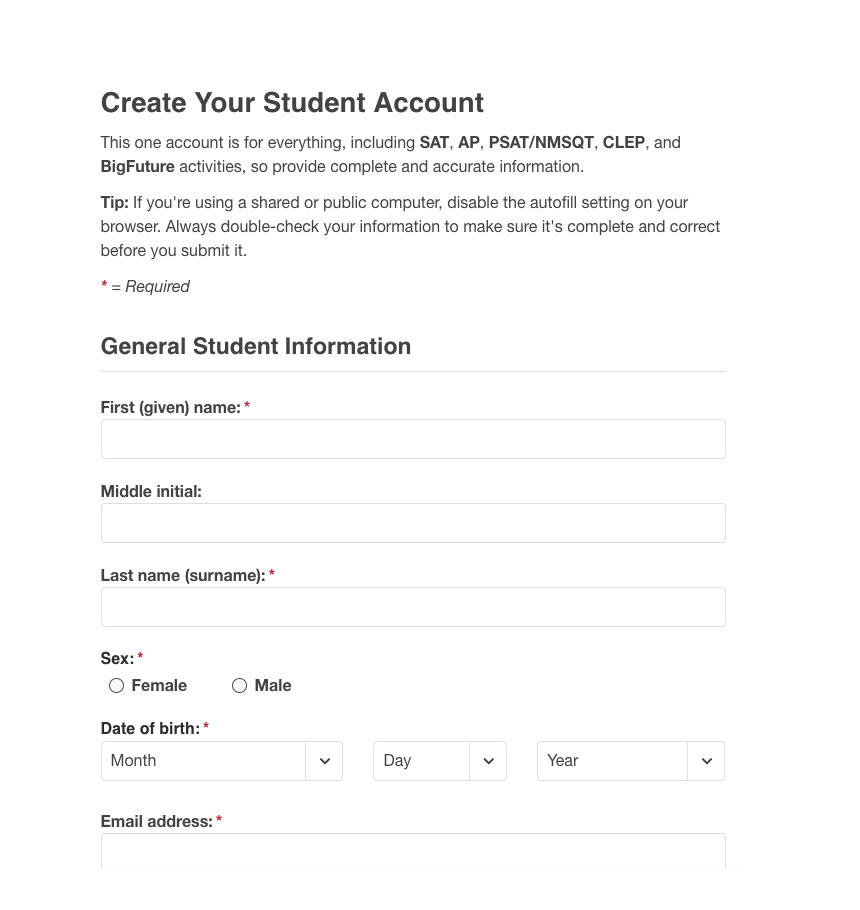
Once you hit “Continue” button, you can see the below-mentioned image where you have to “Create Your Student Account.”
Here you have to fill up the General Student Information such as First Name, Last Name, Sex, Date of Birth etc. You need to ensure every detail is perfectly entered after filling up the information.
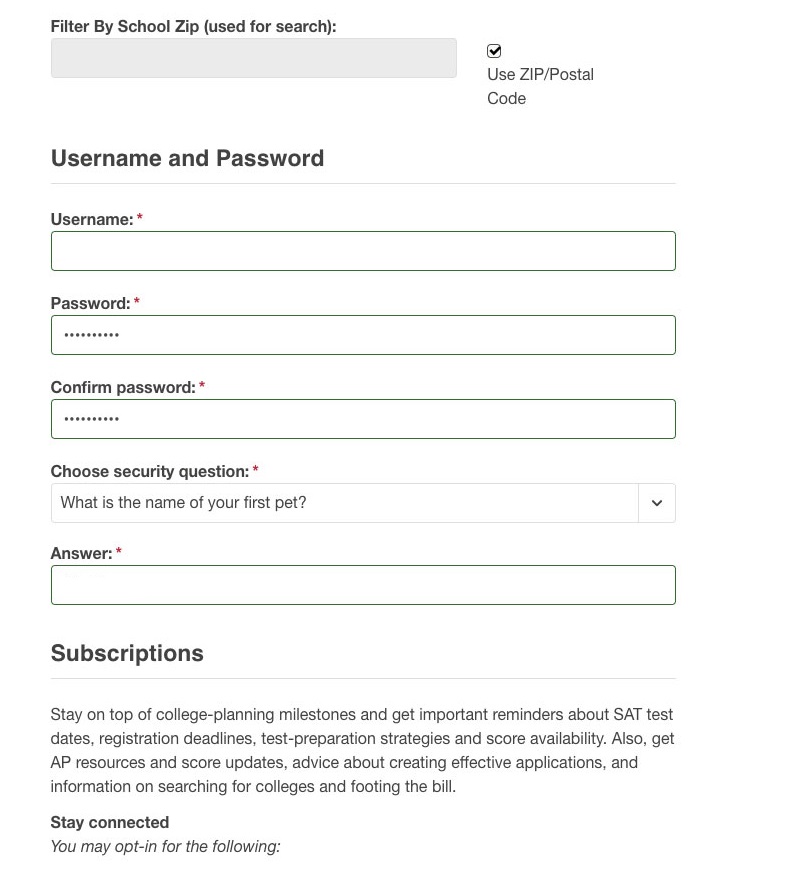
Once you fill in the General Student Information, your next step is to give you a Username & Password for the Student Profile you’re creating.
After filling up the Username & Password section, it’s time to get the Parent Information. Here you have to fill up the Parent First Name, Parent Last Name, Email Address etc.
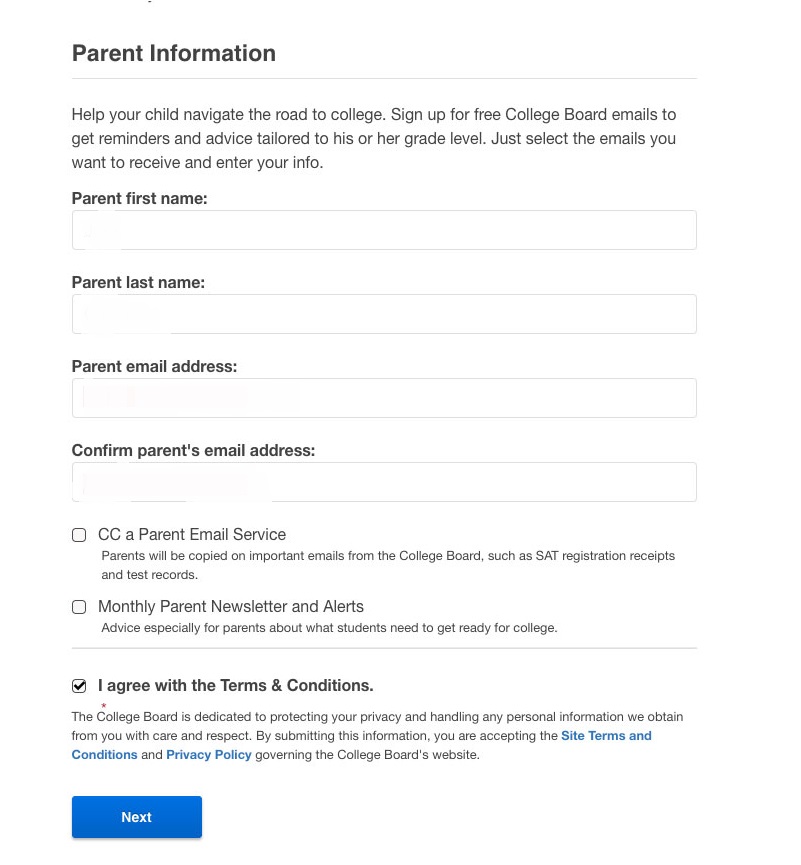
Once you fill in all the details, you will get the below image on screen which asks you to confirm the Student Account.
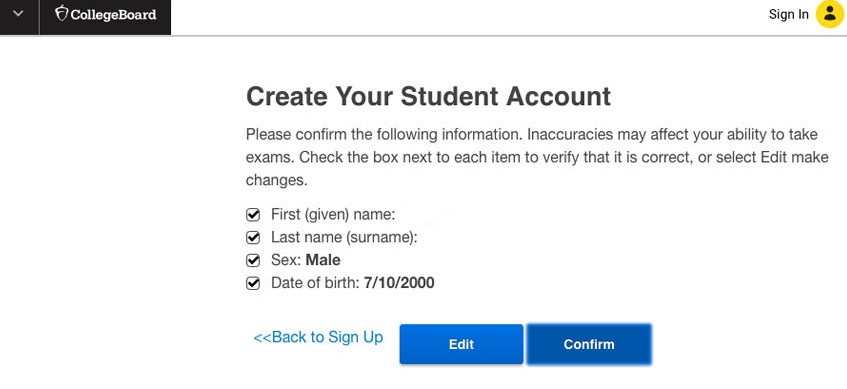
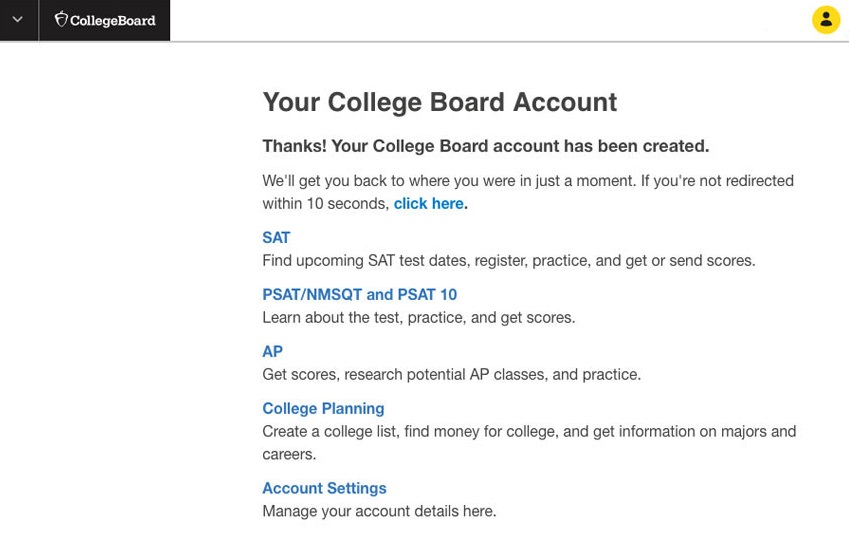
The moment you hit the “Confirm” button, your College Board Account will be ready.
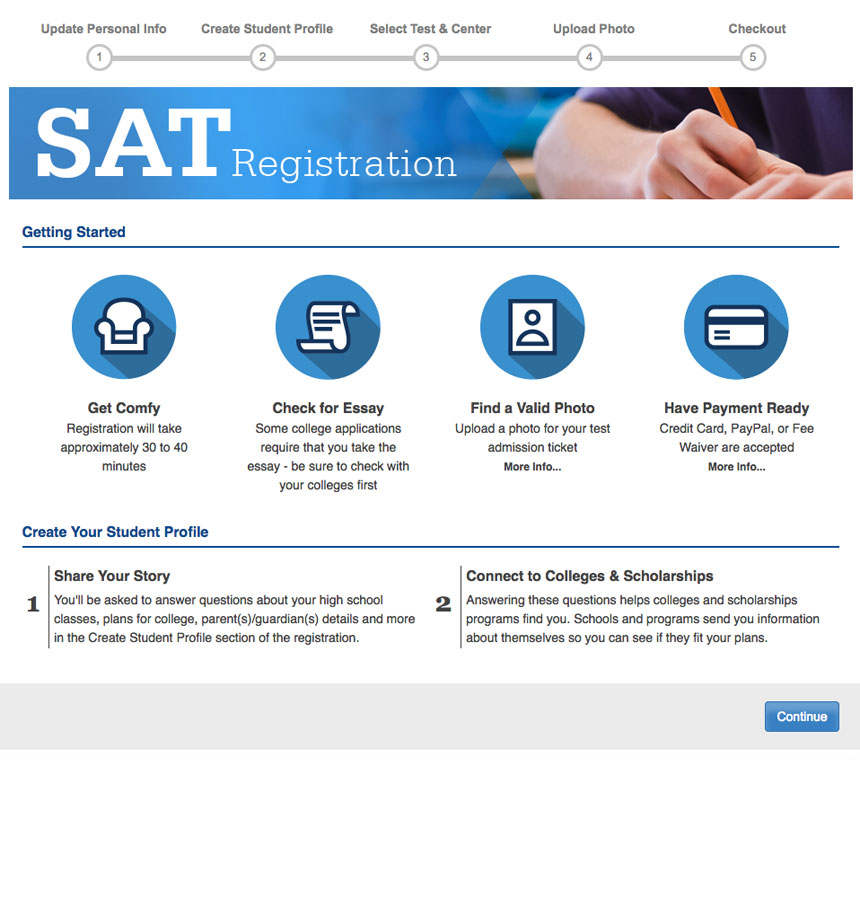
Step 3: SAT Registration –
You will have to register for the SAT test in this step. So you have to fill up all the details regarding your Personal Details, Academics, GPA Rank, Activities and College Plans. The homepage of the SAT registration should look like:
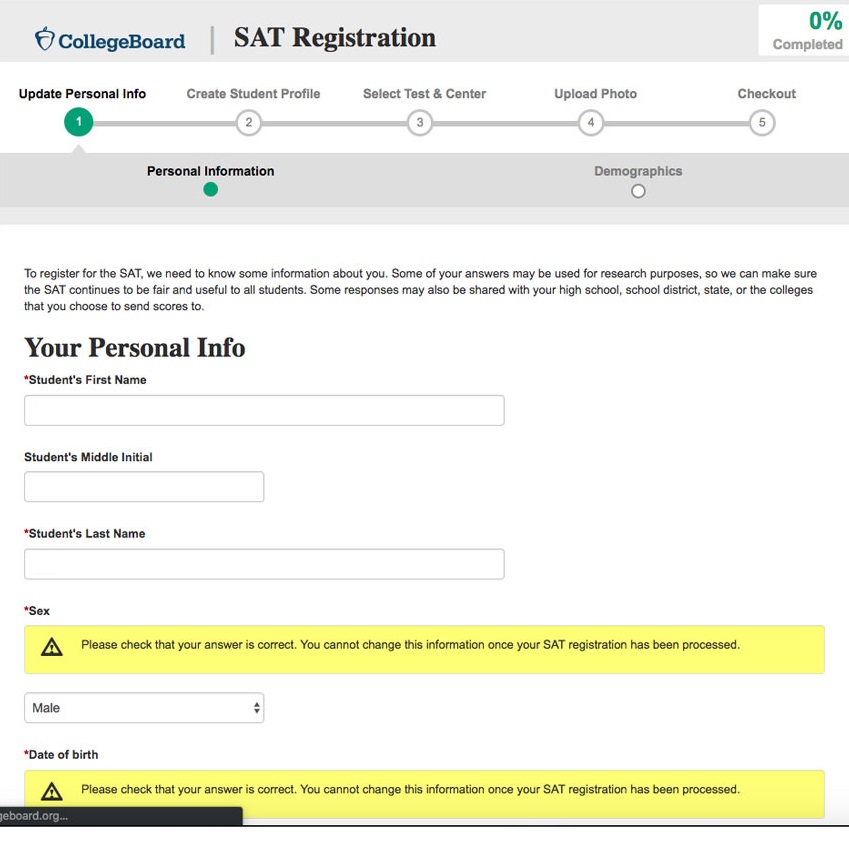
Enter Your Personal Information
This step consumes a lot of time. In this step, you have to update your personal information. You can look at the below image.
Once you finish Updating Personal Info, you have to Create Student Profile.
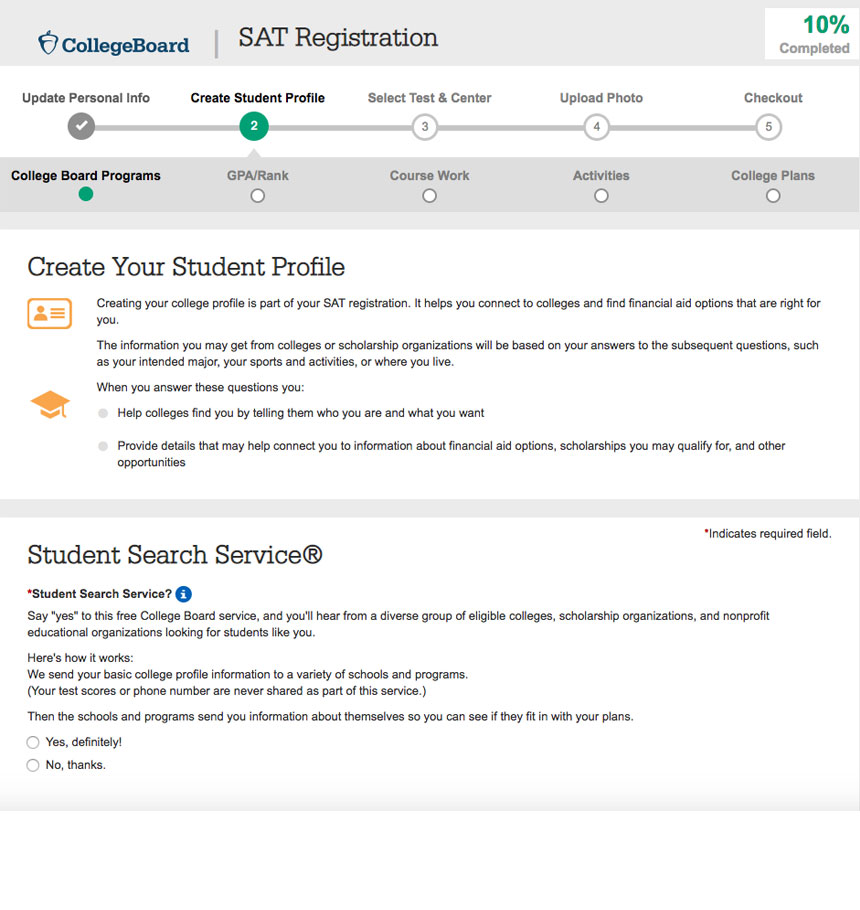
Create Student’s Profile:
This section helps you to connect to colleges and find Financial Aid and options that are right for you. This section also gives you an opportunity to hear from a diverse group of eligible colleges, scholarship organizations and non-profit educational organizations that are looking for students like you. If you want to use this feature select “Yes” option at “Student Search Service.”
GPA / Rank:
You have to fill up your GPA / Rank option here. This option gives you an opportunity to compare you with the other students of your age subject-wise. Hit “Continue” button to head for the next step.

Course Work:
In this Course Work section, you have to mention all your high school courses you’ve taken or the courses you are about to take in all the subjects like Math, English, Science, Social Studies and Languages.
If you’re aiming to take honors in one or more courses in an honours, AP or dual enrollment course, please also check the corresponding box which is the extreme right side column.
Here’s the list of images you can go through while filling in the application form.


Activities
Once you finish filling up the Course Work section, it’s time to list all your “High School Activities.”
Choose all the activities and sports you love playing. You can select up to 10 activities that you have participated or aiming to participate.
Don’t forget to check the Officer/Award option if you have had a Major Office or Position of Leadership like Class President, Varsity Team Captain, Officer. You can also check this option if you’re recognized with unique recognition like Varsity Letter, Regional Science Fair Prize, State Orchestra etc.

After checking up all the options in High School Activities, you will get the “Arts & Music” option. Choose the Arts & Music courses you are already familiar with and also choose that you’re about to participate in among these courses.
Next is the “Sports” option. You can choose up to 6 sports you are familiar with or you’re about to participate in.

The last sub-section here is the “College Programs and Activities.” Check the boxes that you’re very keen to pursue them in college.

Once you hit “Continue” button and finished the “Activities” part, you will head for the “College Plans.”
College Plans:
This section is asked by the College Board especially to know your vision about the Level of Education you’re planning to pursue and in the College Majors sub-section, you choose an area of study you might find interesting or your prospective major. You are allowed to add up to 5 Majors here.

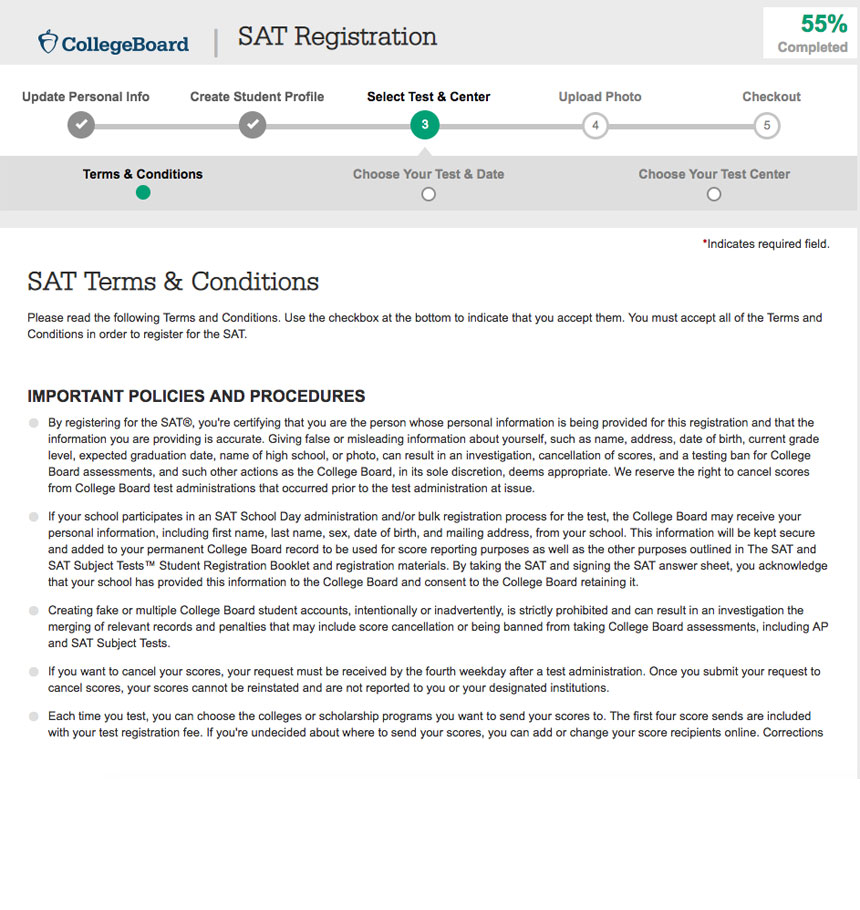
Step 4: Select Your Test & Centre:
Now you’ve landed on the Select Test & Centre section. You will be landed on the exact image like the below-mentioned one. Check this pic to make yourself familiarize with the image. You need to choose the test date and agree to all the terms and conditions here.
Agree All Terms & Conditions
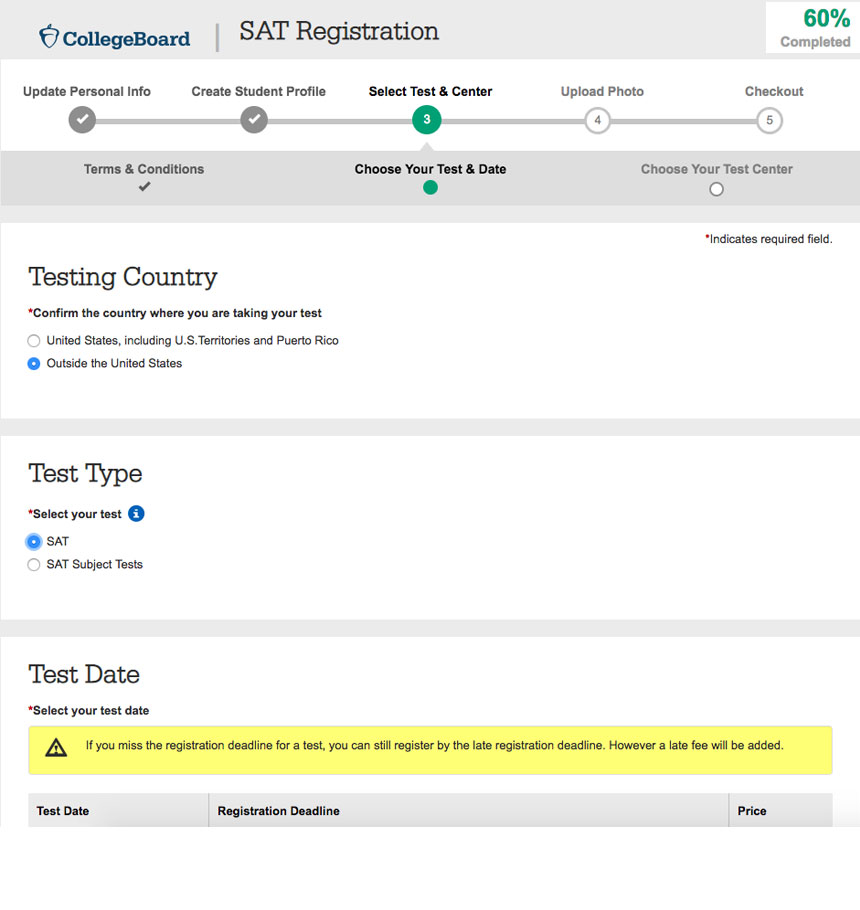
Choose Test & Date:
Once you agree all the terms and conditions, you need to fill up the Testing Country, Test Type and Test Date, SAT Essay, Testing Accommodations and Fee Waivers in the “Choose Your Test & Date” sub-section.
in the “Test Type” sub-section and select up to 3 Subject Tests you wish to take.
If you’re eligible to the “Testing Accommodation” or “Fee Waivers” then you can clearly select them.
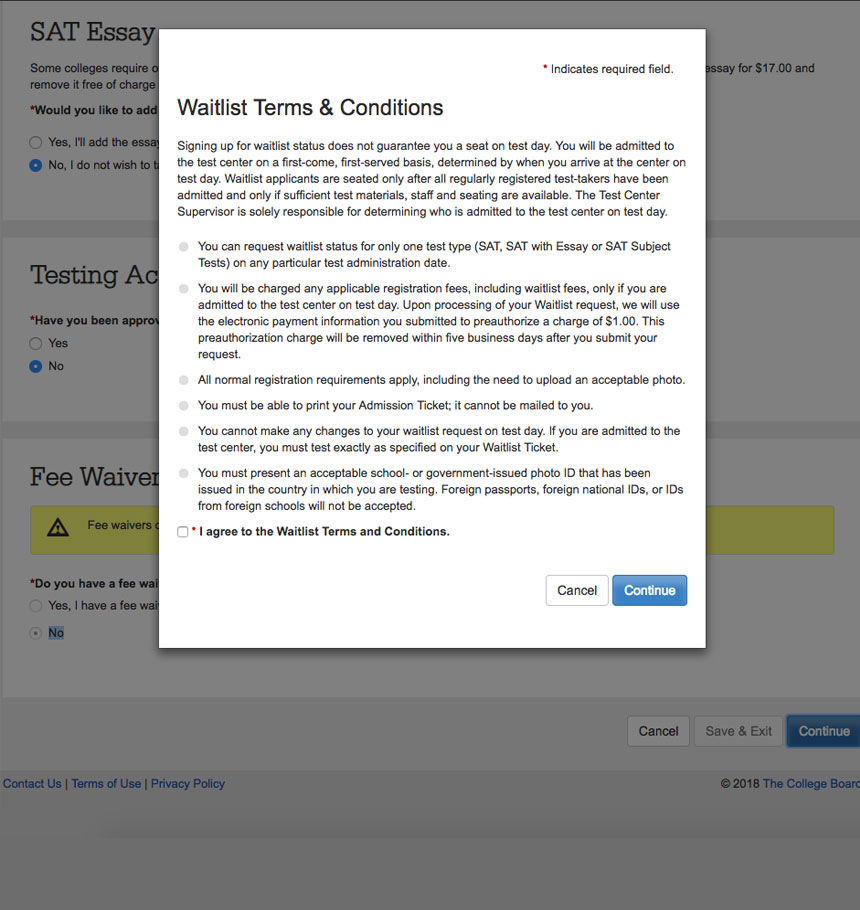
If your testing date is already booked and you have no slots, you will be waitlisted. Check the below-mentioned pop up which asks you to agree for the waitlist terms and conditions. Read it completely before hitting the agree button.
Once you hit the Continue button on the waitlist pop up, you’ll be headed to “Choose Your Test Centre” sub-section.
Choose Your Test Centre:
Now, you’ll be headed on the “Choose a Test Centre”. Now choose the test centres that are close to your home. Keep in mind that all test centres don’t allow the SAT Subject Test and choose the best test centre nearby your home.
Make sure that the test centre you’ve chosen allows SAT Subject Tests as many test centres do not allow SAT Subject Tests. So double-check this before choosing the test centre.
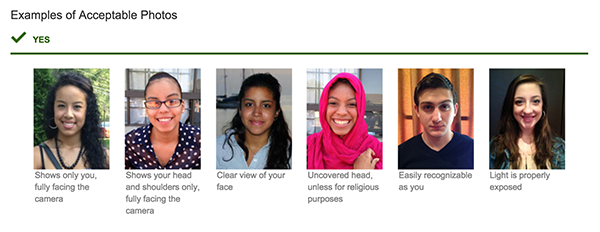
Step 5: Upload a Clear Photograph:
Now, you will be asked to upload a photo of yours. Upload a clear photo where your face is totally visible and it shouldn’t include other people. You can even crop the photo after uploading it.
Here’re the sample photos that are acceptable by the College Board:
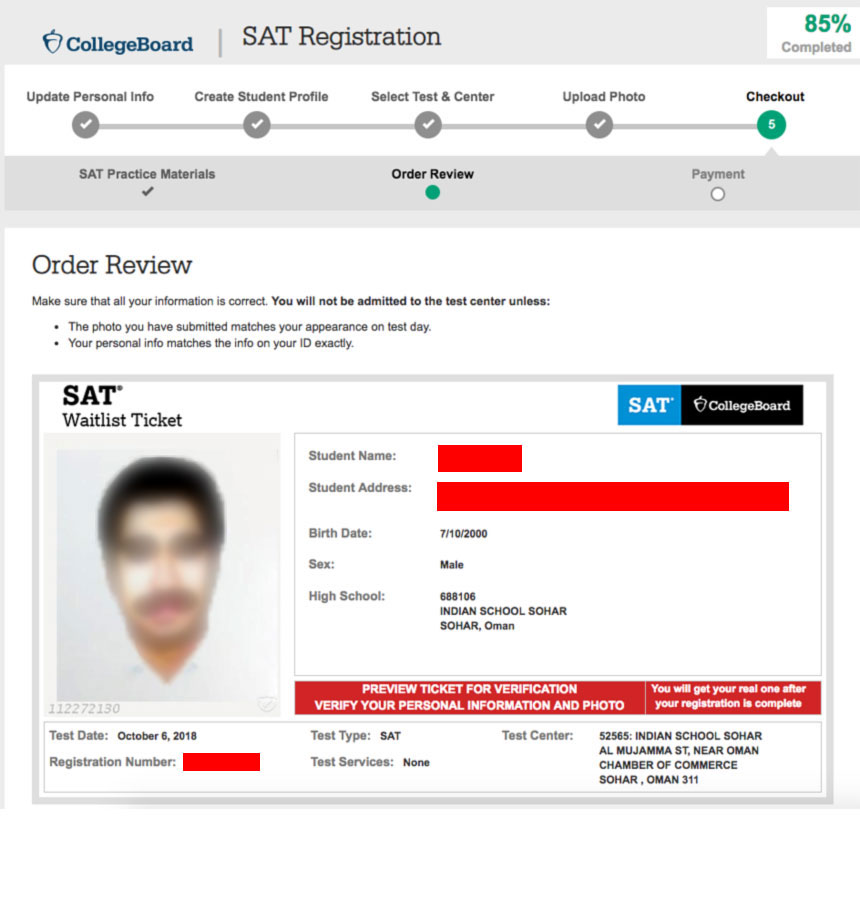
Step 6: Check Out:
After uploading the photograph, you’ll be landed on a page where you have to pay the fees and there’s also an option to buy a lot of SAT Subject Test prep books. You can prefer this option to buy if you’re keen to learn more stuff in less time.
Now, review all the details once and check everything is fine since inception.
Check if everything is fine or not. Now “Review Your SAT Admission Ticket” and “Make Payment.”
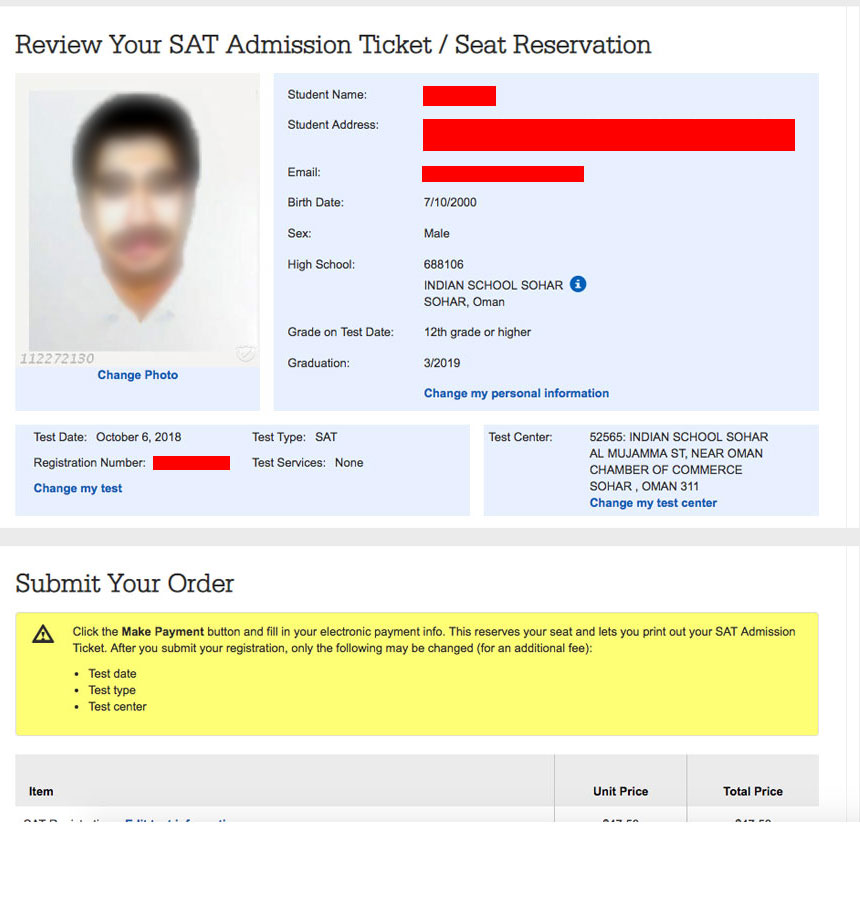
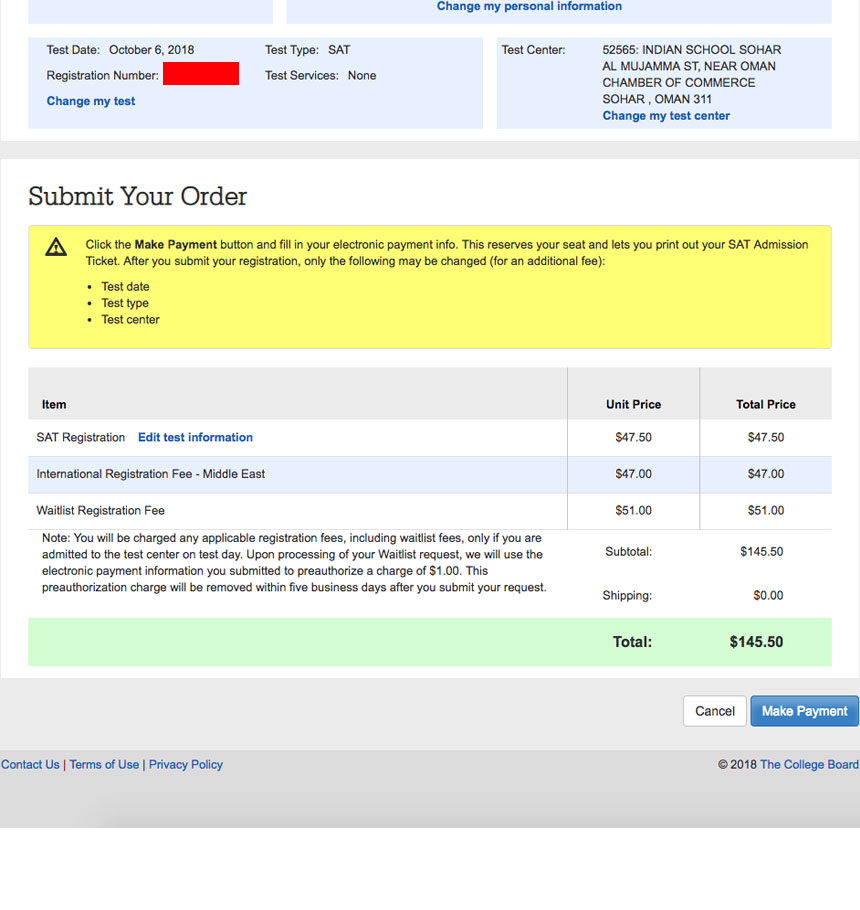
You can pay via Credit Card, PayPal etc according to your comfort.
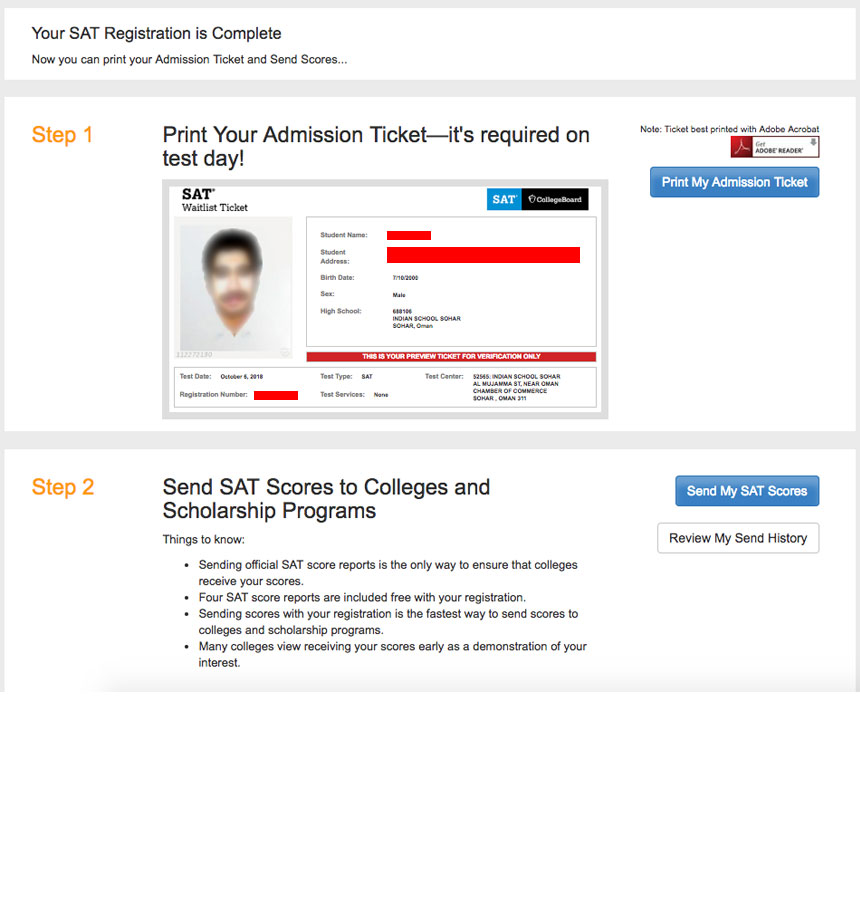
Once your SAT Registration is complete, now you can print the Admission Ticket and Send Scores.
Important Points to Keep in Mind:
- If you are applying for a fee waiver, enter the identification number on your fee waiver card.
- If you’ve been approved for the test accommodations, enter the SSD number on your eligibility letter.
- If you’re a home-schooled, enter 970000 when asked for a high school code.
SAT Subject Test registration process is pretty similar to the SAT General one and it won’t consume more than 20 minutes (apart from filling the entire student profile)
How to Register By Telephone?
It’s entirely free to register via telephone. If you’re a student from the United States, phone on the 866-756-7346 and if you’re an international student, you can phone on the 212-713-7789.
How to Register via Offline?
If you have no access to the internet, download registration forms in “The Paper Registration Guide for the SAT General & SAT Subject Tests” and make a hard copy of it. Now fill up the registration form and send it to the below address:
Address : College Board
SAT Program
P.O. Box 025505
Miami, FL 33102